Create an exception in pfBlockerNG
Spoiler: Because sometimes we have to allow an ad, we are going to add an exception to our DNS blacklists. Don't worry, we'll delete the exception next 😉. You can either use the alerts screen (a button allows you to authorize a blocked domain), or add an entry manually in the whitelist.
There are many benefits to remove ads. The applications become usable again, the websites are much cleaner, we save speed, computation,... for a bit, it saves baby seals.
Technically, this is already the case with browser modules like uBlock Origin, but by acting on the DNS of the firewall, we become compatible with all applications, including those of neighbors and friends when we share them our internet connection.
But there are also a few minor annoyances. When you do a search and click on the sponsored links (a moment of inattention, it happens), you get an error page. The problem becomes more serious when publishers place intermediate pages (for advertising and/or statistical purposes) between a link and its target.
This was the case, for example, when we wanted to download Qt Creator. When we clicked on
the Go open source button, we were first directed to a page
at HubSpot which provides them with inbound marketing
statistics and indicators. As the corresponding domain
(cms.hubspot.com) is in the blacklist, we were stuck on an
error page.
This is no longer the case and you can download the installer even behind pfBlockerNG.

So for all those times you need to disable your lying DNS, and without further waiting, here's how to authorize a domain in pfBlockerNG.
Unblock via alerts
Rather than adding an exception manually (what we will see below), we will first do it automatically via the alerts screen, in the Firewall / pfBlockerNG menu then the Alerts tab.
This screen contains a table with the last 5 blockages. You can
increase this number in the Alert Settings area and by
increasing the corresponding threshold (DNSBL) and then clicking on
Save Settings.
Once you have generated the block by browsing to the offending site,
a corresponding row appears in the DNSBL table, in our case
it is cms2.hubspot.com.

To unlock this domain, you can click on the icon  (plus-circle).
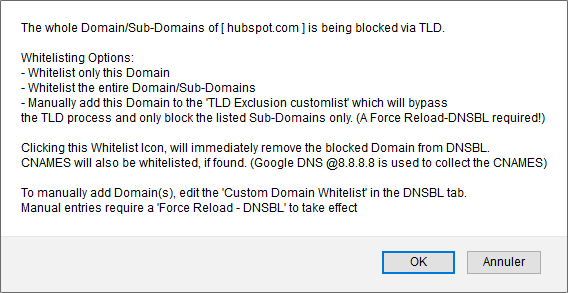
The first pop-up explains how to proceed, click on
 OK.

The next pop-up asks you if you want to block the whole domain or
just the subdomain. As I intended to remove the exception later, I put
Yes so as not to bother.

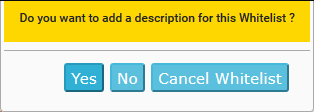
The next pop-up asks you if you want to put a description to this
exception. Again, the goal being to make a temporary exception, I chose
No.

The last pop-up takes a little time to appear and confirms that the exception has been added and taken into account.

As the error message indicates, it is necessary to clear the DNS
caches before trying the connections again. For browsers, restarting
them is enough. Under windows, ipconfig /flushdns is a very
good friend 😉.
To return to Qt Creator, we can then go back to the download page, click on the button, undergo the transparent redirection to get the download confirmation page, click on another button and finally, get the binary.
It is at this stage that we realize that this final page is directly accessible from the outside (there is no filter on the referer) and allows you to download Qt Creator directly:
https://www.qt.io/download-thank-you
The exception is therefore useless since we can still download Qt Creator... We console ourselves by saying that we would not have discovered it if we had not added an exception.
To reblock the domain, you have to go through the manual configuration.
Unlock by hand
For that, we will manually change the list of exceptions via the Firewall / pfBlockerNG screen, DNSBL tab.
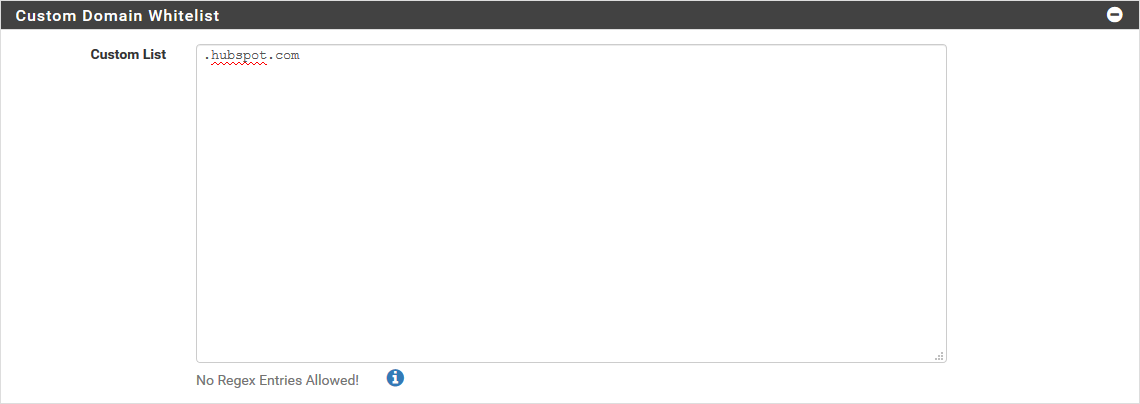
Going down the page, we find the list in question Custom Domain Whitelist. This contains one exception per line, so you can add and remove them by editing this list manually.

Once we have deleted the exception we had previously created (the
line with .hubspot.com), we go to the bottom of the page
and click on Save.
Unsurprisingly if you had read the help (button  , info-circle),
this change will only take place next time the database is reloaded. You
can either wait (depending on the setting you had made) or manually
force it (which we'll do here).
To force a reload, go to the Firewall / pfBlockerNG / Update menu and check the following options:
- Select 'Force' option: we choose Reload.
- Select 'Reload' option: we choose DNSBL.

We then click on Run. The log area shows the
progress of the process. We wait for it to finish (it will show
UPDATE PROCESS ENDED). The exception list is then taken
into account.
And after ?
Rather than just disabling pfBlockerNG, you can now bypass certain select requests and unblock certain applications (i.e. iTunes when you want to backup phone content).